Python🔗
We install many versions of Python and all the common packages (many bundled with Python, many more as seprate modules)
The software we build for the cluster is optimized for the hardware. Pre-compiled versions are often only built generically, which will give up a lot of performance and features. Prefer using the packages from the the module tree.
Avoid using pip install directly. It will place user wide packages directly into your ~/.local/, not only using up most if not all or your disk quota, but won't be isolated and will leak into all other containers and environments likely breaking compatibility. Please only follow the examples below instead.
Don't mix modules with containers. They can never assumed to be compatible and will in the best case just crash.
Virtual environments🔗
To use virtualenv, we need load its module first. At the same time, we can load other preferable modules built from the same toolchain. Some of them may already have virtualenv as its dependency, but you can always explicitly load the module.
$ module load virtualenv/20.23.1-GCCcore-12.3.0 matplotlib/3.7.2-gfbf-2023a SciPy-bundle/2023.07-gfbf-2023a h5py/3.9.0-foss-2023a
$ module load JupyterLab/4.0.5-GCCcore-12.3.0  # Load JupyterLab if you are using the virtual environment on OnDemand portal
- Note: For toolchains earlier than
2023a,virtualenvis included in the Python modules and you don't have to load additionvirtualenvmodule.
Once we loaded all needed modules, we create a new virtual environment (only done once), e.g.
$ virtualenv --system-site-packages my_venv
You will see a directory appear in your currenct directory. To use this environment, we must activate it and load the same modules we have loaded before creating the virtual environment (every time you log in)
$ module load virtualenv/20.23.1-GCCcore-12.3.0 matplotlib/3.7.2-gfbf-2023a SciPy-bundle/2023.07-gfbf-2023a h5py/3.9.0-foss-2023a
$ source my_venv/bin/activate
Once the virtual environment is activated, you should see the name of the virtual environment appears in front of you console. In this example, it will be
(my_venv) ... $
and you can use pip to install additional packages after activating the environment
$ module load virtualenv/20.23.1-GCCcore-12.3.0 matplotlib/3.7.2-gfbf-2023a SciPy-bundle/2023.07-gfbf-2023a h5py/3.9.0-foss-2023a
$ source my_venv/bin/activate
(my_venv) ... $ pip install <some_modules>
(my_venv) ... $ pip install <some_other_modules>
If you find that your packages are install into your ~/.local directory. It is most likely you forget to activate the virtual environment.
Note that there is a global pip configuration active on Vera and Alvis (see
pip config -v list). That by default sets the following options for pip
install:
--no-useroption is very important to avoid accidentally doing user installations that in turn would break a lot of things.--no-cache-diroption is required to avoid it from reusing earlier installations from the same user in a different environment.--no-build-isolationis to make sure that it uses the loaded modules from the module system when building any Cython libraries.
For more information see this external guide
Accessing virtual environments in Jupyter Notebook🔗
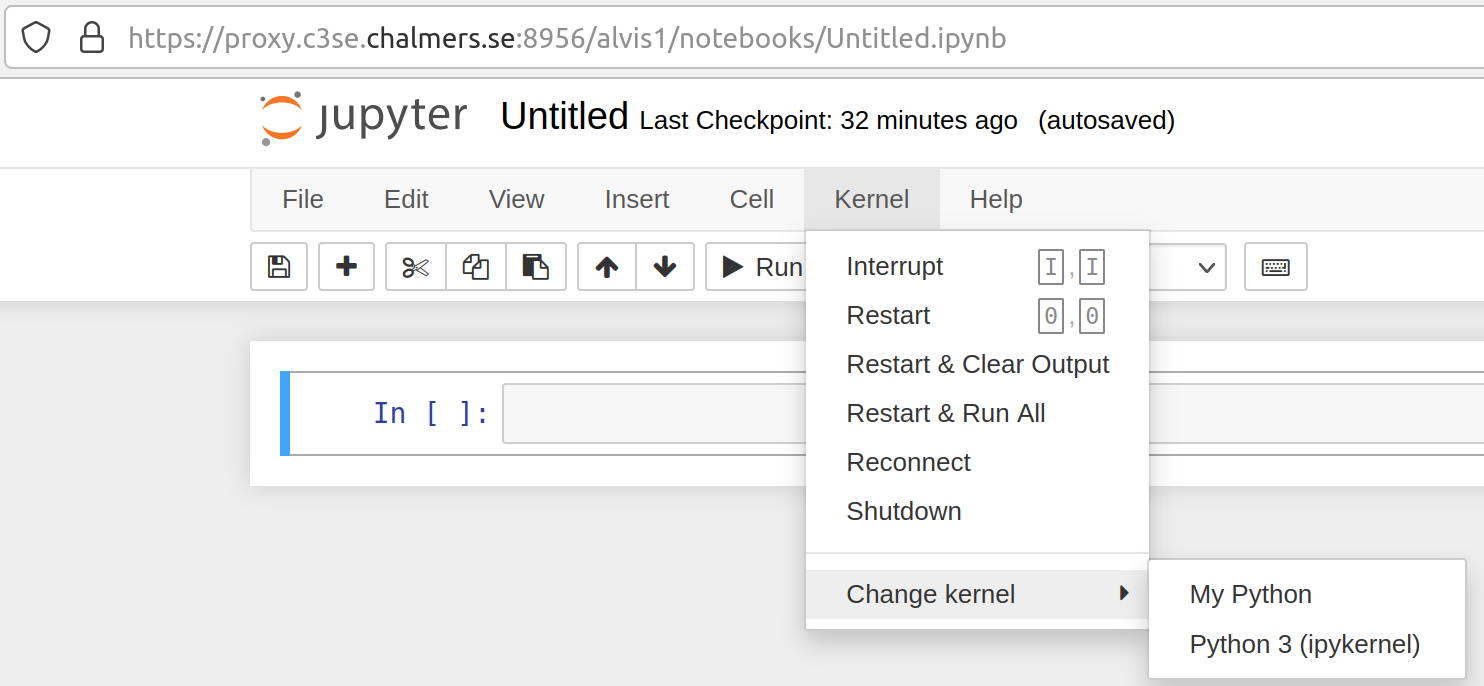
If you're using virtual-environments in connection with Jupyter Notebook you might have problems that the kernel used in Jupyter doesn't recognize the correct site-packages. To resolve this do the following after completing the above steps
$ module load virtualenv/20.23.1-GCCcore-12.3.0 matplotlib/3.7.2-gfbf-2023a SciPy-bundle/2023.07-gfbf-2023a h5py/3.9.0-foss-2023a
$ module load JupyterLab/4.0.5-GCCcore-12.3.0
$ source my_venv/bin/activate
$ python -m ipykernel install --user --name=my_venv --display-name="My Python"
In notebooks
 or in jupyterlab

- Note: about using your virtual environment on OnDemand portal, please refer to OpenOndemand portals
Conda environments🔗
The best way to create conda environments is instead do it with a container. There are example recipes at
/apps/containers/Conda/conda-example1.def
/apps/containers/Conda/conda-example2.def
/apps/containers/Conda/conda-example3.def
apptainer exec conda-example.sif python my_script.py
Please see our container page for more details.
There are Anaconda3 modules available, which can be directly used (but might not be as optimized as the other software in the module tree).
If you need to set up a conda environment, you should instead always use a container.
Note: The containers themselves serve as environments, you don't need to set up conda environments inside the containers (see example recipes) as it only complicates using the container.
Matplotlib🔗
Using matplotlib in python script🔗
Please note that when running matplotlib in python script, you might want to run
import matplotlib
matplotlib.use('Agg')
to avoid matplotlib using the X Windows backend, which does not work if X forwarding is not enabled (i.e. does not work in batch jobs).
Using matplotlib in jupyter notebook🔗
To use matplotlib in notebook, you can enable the inline backend by
%matplotlib inline
on the top of your notebook. [Reference]
NumPy and SciPy🔗
As it is impractical to have each individual extension as a module, so you can find the optimized builds of numpy and scipy as part of the SciPy-bundle. In general, you can use module keyword xxx to search for a particular extension that might be part of a module bundle.