Alvis OnDemand🔗
Alvis is available as an Open OnDemand powered web service at https://portal.c3se.chalmers.se.
Open OnDemand is a HPC portal accessible from a web browser and comes with features such as file managment, command-line shell access, job management and monitoring. Open OnDemand is accessible using most browsers and is built for scientific workflows using a scheduler. Open OnDemand includes support for applications such as Jupyter, RStudio, MATLAB, and more.
Advantages of Alvis OnDemand🔗
Traditionally access to HPC resources has largely been terminal-based. Users has been required to install and operate a terminal emulator, access a remote system and carefully compose files for batch-job processing. If you were lucky, the labour from one HPC system could be reused on another, but not always. Open OnDemand simplifies these prior steps. In particular for users from non-traditional HPC fields with less experience in terminals and command-line operation. To access Alvis OnDemand you only need a browser, an account and the URL to the Open OnDemand portal. If you work mostly using Jupyter notebooks, or in a Desktop environment, the setup work is greatly reduced, saving you time for science.
Requirements🔗
- You need a SUPR account and membership in a active project with allocation on Alvis.
- You need to connect from a network on SUNET.
- A modern browser such as Mozilla Firefox, Google Chrome or Microsoft Edge. The later versions of each is expected to work best. Safari might work, but have reported issues with frameworks used by Open OnDemand.
A note on browser support: Open OnDemand uses the Shell App to provide an interactive shell using the browser. In some versions of Google Chrome not all special characters can be typed into the shell.
Login🔗
To access Alvis OnDemand open a web browser and type https://portal.c3se.chalmers.se in the address bar. This will take you to the login page. Click the button Login to Alvis OnDemand. You will be redirected to SUPR where you will be prompted to login and prove your identity. Login using your SUPR credentials. Click the Prove My Identity to C3SE button and you will be forwarded to the Open OnDemand dashboard.
⚠️ Remember to log out. An active and logged in session in Open OnDemand offers similar access to Alvis as traditional remote shell access. Always make sure you log out when leaving your computer. Closing the browser tab is not enough as most browsers keeps active sessions for some time.

User guide🔗
All navigation is performed using the top menu. Alvis OnDemand provides four main features. Files for accessing the File manager, Jobs for composing and monitoring active jobs, Clusters to open a interactive shell and Interactive Apps to quickly launch applications accessible from your browser, such as a Jupyter notebook.

Files - Manage your files🔗
The file app has been known to cause lockups, leading to 502 errors when trying to use anything in the portal until the server is rebooted. Light use is likely fine, it should not be used for any significant file transfer.
Jobs - Create and manage jobs🔗
Click on Jobs to view Active Jobs or to open the Job Composer from which you can compose and submit jobs. The Active Jobs view lists all your active jobs, including your jobs submitted outside of Open OnDemand. Completed job will be listed for a short time.
Active jobs🔗

Click on the left most arrow to view job details. At the end of job details you have the option to open the output location in the File Manager or start a terminal. Note that the terminal will start where you submitted the job. If the job is running on a compute node opening a terminal will not start the terminal at the compute node.
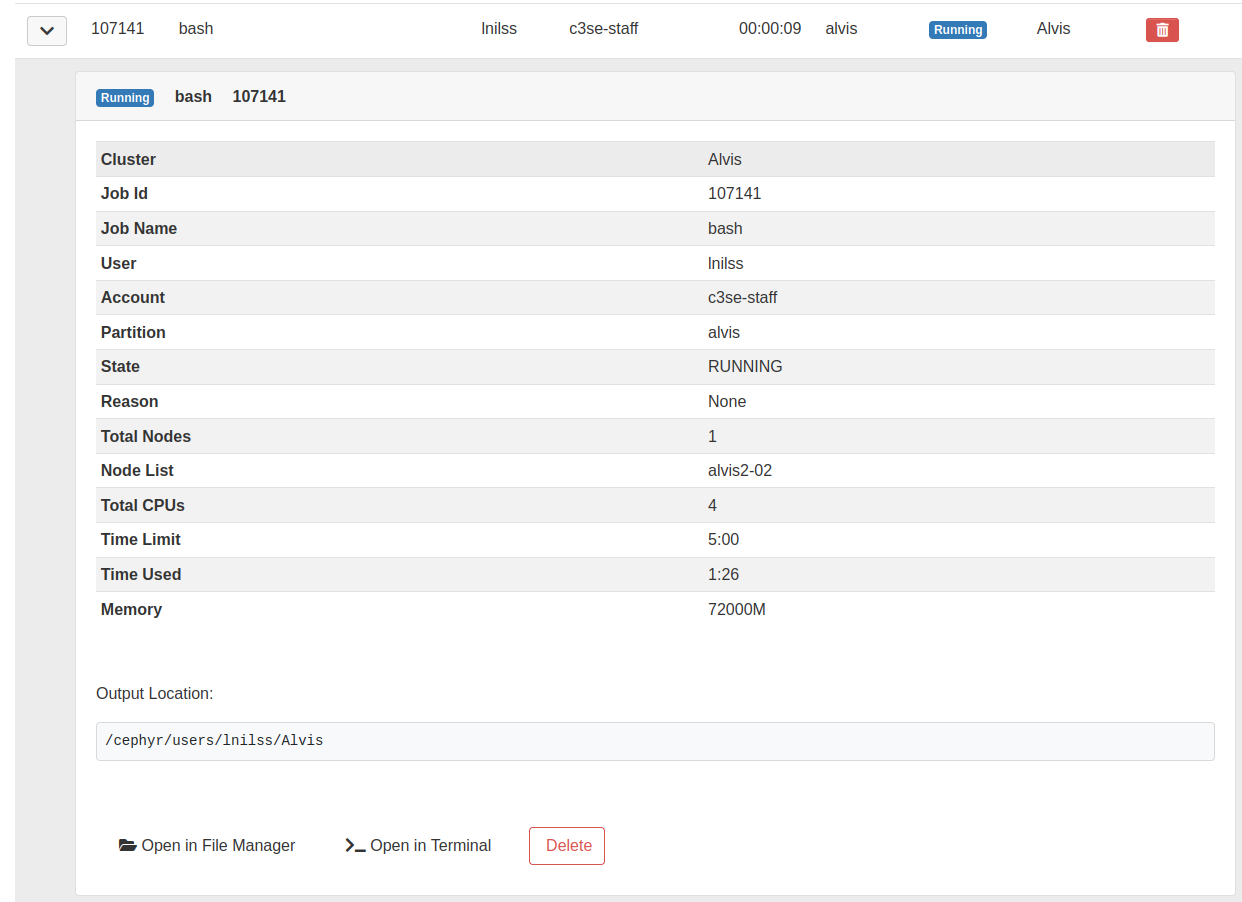
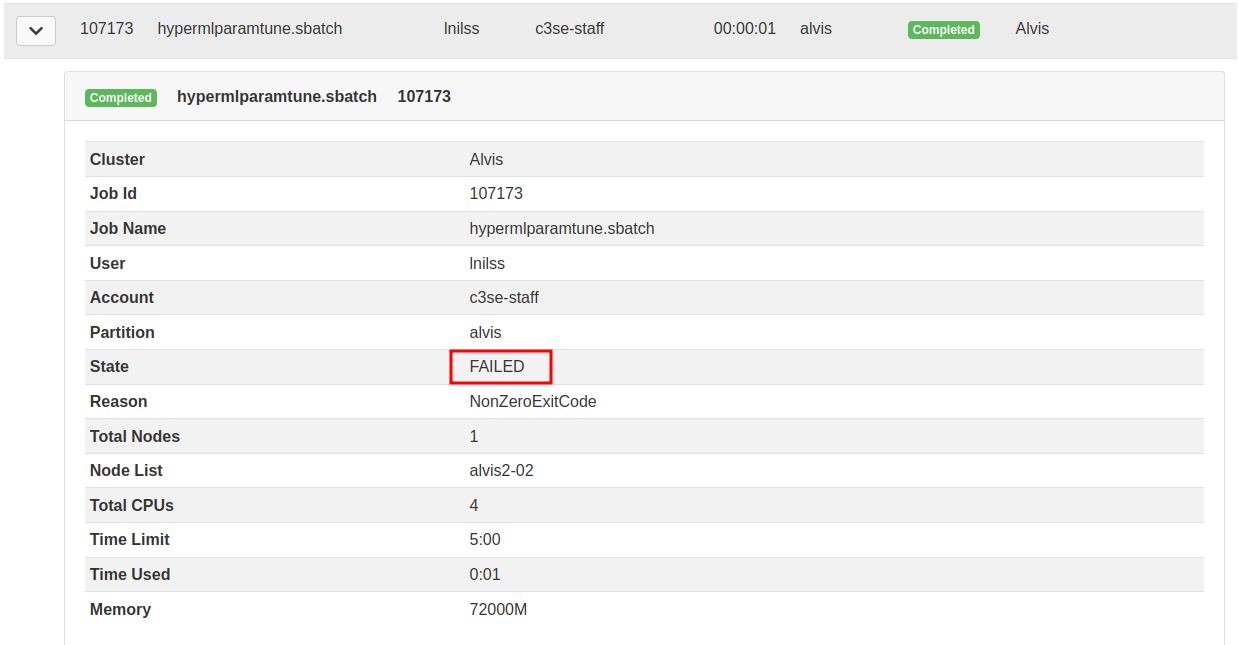
⚠️ Status is not the same as job state. Please note that jobs that fail (exit with a non-zero return code) will still show as status completed. You need to click on the left most arrow to view the job details to see the actual job state as reported by Slurm.
Capture below shows a COMPLETED but FAILED job
Job composer🔗
The Job composer is a tool to compose or construct a Slurm job. All the requirements from submitting a Slurm job still holds of course and you need to either specify or provide a path to a job file containing the required job parameters. As jobs often have high reusability, Open OnDemand also allows you to be more productive by offering job templates.
Click on New Job. You have two options, either compose a new job from a default template, or create a job from a path you specify. We will show the second alternative.
Creating a new job from a path you will need to enter the Source path, a
path to a directory containing a template (a Slurm job submit file) with
headers (#SBATCH ...) you intend to use frequently. A minimal template
directory is a directory and a Slurm job submit file. This is exactly what
you get if you instead chose to use the first option From Default Template.
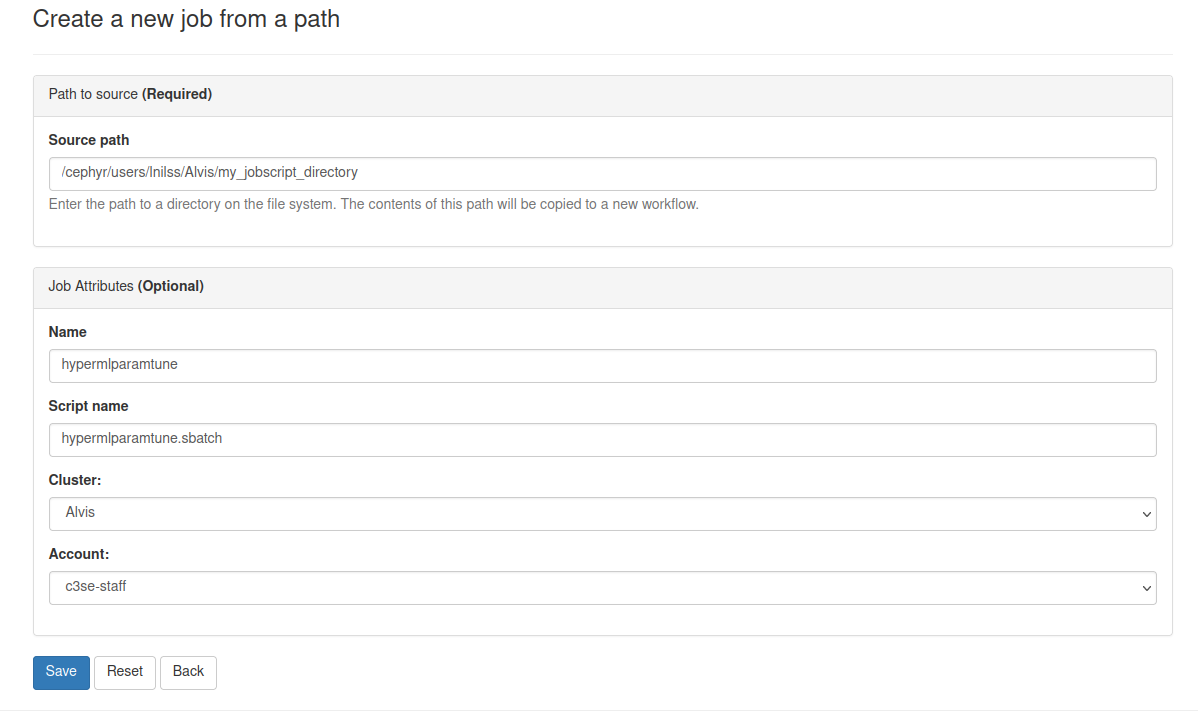
Staging template dir must be less than 1 GiB: Job Composer limits the template directory to 1073741824 bytes (1 GiB). It is thus not a good idea to use the root of your home or project directory as the template directory.

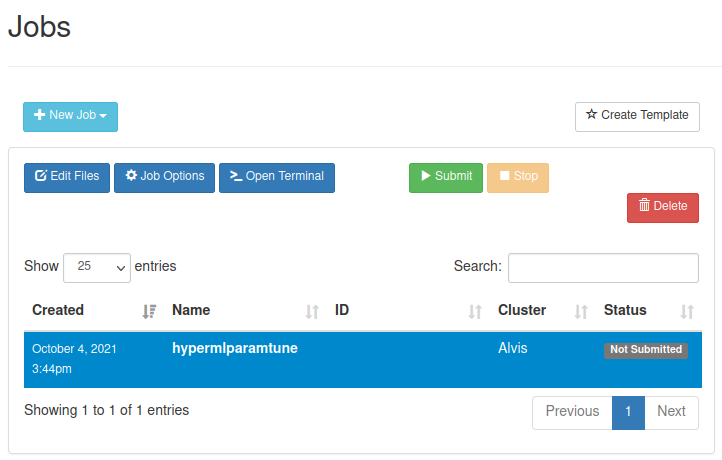
Clicking on Save brings you back to the Job manager. With our recently saved job you can now chose to edit files, specify job options, open a terminal or submit the job.
Clusters - Quickly launch a login shell on Alvis🔗
Open OnDemand is currently only supported for the Alvis cluster. Clusters will present you with an option to launch a login shell on the Alvis login node.

Interactive Apps🔗
The Interactive Apps tab allows you to quickly configure a job that launches
an interactive application, such as a Desktop or a Jupyter notebook server.
The application is started as a Slurm job on Alvis. You will need to enter a
project, the duration of the job, node type to use (i.e. how many GPUs do you
need), a runtime and (optional) a working directory. You can customize your
own Runtime by creating e.g. ~/portal/jupyter/my-env.sh (you may need to
first create the directories mkdir -p ~/portal/jupyter). For examples how
runtimes are constructed see the existing runtimes in /apps/portal/jupyter/.
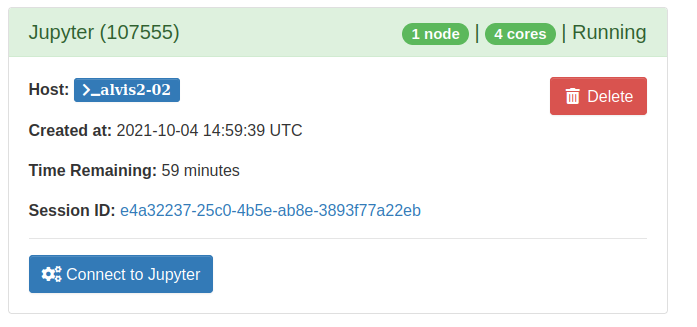
As the job is submitted to the Slurm queue you will need to be patient until it starts. Once it starts you can find and start the session from the My Interactive Sessions tab.

Desktop🔗
The interactive Desktop app will give you a desktop session on one of the compute nodes. This is useful for if want to launch heavy computations through some graphical user interface.
You find applications in the upper left corner or by right clicking on the desktop area. When you are done with your session you can log-out in the upper right corner or deleting the session among "My Interactive Sessions" in the Open OnDemand dashboard.
Jupyter🔗
The Jupyter app will launch a JupyterLab server. If you prefer a classic JupyterNotebook instead you can launch this by searching for "Launch Classic Notebook" in the searchbar in the upper left corner. You can shut down the server under "Files" in the upper left corner or by deleting the session among "My Interactive Sessions" in the Open OnDemand dashboard.
To modify the environment that is available in Jupyter you can select among the
options in the drop-down menu before you launch the application. You can add
your own environments by adding files ending with .sh in ~/portal/jupyter/, e.g.:
ml purge  # Ensure we don't have any conflicting modules loaded

# Load all your needed modules
ml TensorFlow/2.11.0-foss-2022a-CUDA-11.7.0 PyTorch/1.11.0-foss-2022a-CUDA-11.7.0 matplotlib/3.5.2-foss-2022a
ml JupyterLab/3.5.0-GCCcore-11.3.0

# Activate your virtual environment if needed
# remember to also use the kernel installed for your virtualenv
# https://www.c3se.chalmers.se/documentation/applications/python/#accessing-virtual-environments-in-jupyter-notebook
#source path/to/your/venv/bin/activate

# You can launch jupyter notebook or lab, but you must specify the config file as below:
jupyter lab --config="${CONFIG_FILE}"
Or, using a container:
ml purge  # Ensure we don't have any conflicting modules loaded

# Replace with path to your container of choice
container=/apps/containers/TensorFlow/TensorFlow-2.10.1-NGC-22.12.sif

# You can launch jupyter notebook or lab, but you must specify the config file as below:
apptainer exec --nv $container jupyter notebook --config="${CONFIG_FILE}"
You can find other examples under /apps/portal/jupyter/.
Running local LLMs🔗
For those who needs a local running interactive LLM, we implement a
chatbot_kernel,
which is capable of launching a few LLMs published on huggingface locally.
Users can install the package in their virtual envionement as they want. For
convenience, we also provide a container having the chatbot_kernel installed
and users can launch the kernel by selecting the Chatbot-x.x.x.sh option in
the droplist of OnDemand Jupyter app. This will also launch a JupyterLab
server, but there will be an additional Chatbot kernel in the Launcher.
Selecting the kernel will allow you launch LLMs locally. Typing %model_list
will show you the models we have downloaded. Some of models may not be provided
due to license issues. If you would like to use your downloaded models, you can
execute %hf_home <path/to/your/huggingface/dir> to let the kernel search
models from your directory. Alternatively, you can also customize your own
launch script as a normal script for Jupyter app and set a proper HF_HOME in
your script. You can see the example in /apps/containers/Chatbot.
- Note: It is more recommended to use A40 or A100 nodes. By default, all LLMs
in
chatbot_kernelusebfloat16. To make them work on T4 or V100 nodes, you may need to set%config dtype float16.