Remote graphics
Important
See our general page on connecting for requirements before you can connect.
Important
The OpenOndemand portal also allows you to get full desktop session, with all applications, directly on a compute node where you can carry out heavy interactive workloads.
We need to reboot the login machines occasionally, killing all sessions, so make sure to always save your work frequently. Remote desktops on the login nodes are intended only for lightweight interactive work.
You can get remote desktop with 3D accelerated graphics on compute nodes via OpenOndemand and on login nodes shown below.
RDP support
We support the Remote Desktop Protocol, or
RDP on alvis1,
alvis2, vera1 and vera2. RDP has widespread support within most modern
operating systems. Examples of desktop client applications include:
- Remote Desktop application for Windows
- Windows App for Mac OS
- Clients like Remmina and krdp for Linux.
The xrdp server on can be connected to directly using a desktop client (using
address vera1.c3se.chalmers.se, vera2.c3se.chalmers.se,
alvis1.c3se.chalmers.se or alvis2.c3se.chalmers.se and port 3389, the
default for RDP).
On Vera, you can either download the .rdp file using the Native client button
in the web interface, which contains a one-time login token, which allows you to
log in using SSO without supplying your password, or you can log in with your
password.
Web client
We are running an in-house developed web client based on Apache Guacamole at
- https://vera1.c3se.chalmers.se
- https://vera2.c3se.chalmers.se
- https://alvis1.c3se.chalmers.se
- https://alvis2.c3se.chalmers.se
The Vera remote desktop logins use the Chalmers idp SSO to authenticate you using a one-time token, and you can select either "Standard" quality (for a slightly compressed but better-performing experience) or "Lossless" to eliminate compression artefacts introduced by Guacamole and get a crisp image, at the cost of slightly worse performance. With a bad internet connection, xrdp itself may still use some compression even in lossless mode. After connecting and waiting for a few seconds, a remote desktop should appear. Clicking the arrow on the right-hand side of the screen reveals the clipboard:
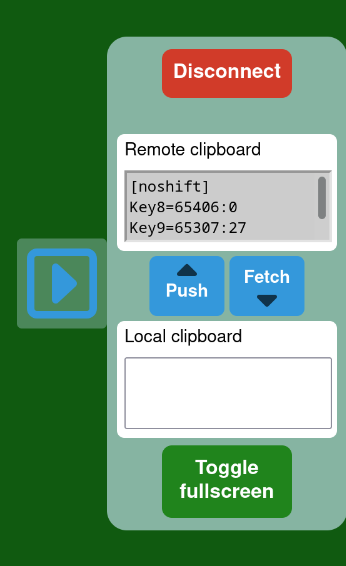
The remote clipboard automatically reflects the remote desktop clipboard, whereas the local clipboard is manual. This is because there is no reliable way to automatically synchronize your local clipboard contents with the remote desktop, for security reasons enforced by your browser. When you copy things in the remote desktop, the test should automatically appear in the "Remote clipboard" area. You can click the "Fetch" button to copy it into the "Local clipboard" area, from which you can manually copy- and paste it.
Similarly, you can type or paste things that you want to push to the server clipboard into the "Local clipboard", and click the "Push" button to push it to the remote server. The text will then immediately be pasteable on the remote desktop. If you want a more natural clipboard experience, we recommend using a desktop application rather than the webapp.
After you disconnect, your session should be saved for 3 days before it is cleaned up, although sometimes your session may not be properly restored and a new one will be started.
Windows Remote Desktop (mstsc.exe)
Important
There are some known issues with mstsc.exe as of April 2026. Try Devolutions Remote Desktop Manager if you are experiencing issues.
Updated 2025-05-27
The built-in Windows Remote desktop client, or mstsc.exe (originally short for
Microsoft Terminal Services Client), can offer very good performance, but can be
tricky to connect with. Generally, using a .rdp file to connect to a
non-Microsoft RDP server which you have not previously connected to will not
work. The following procedure, however, should work for both personal,
self-administered, and Chalmers-administered Windows machines (for the Windows
machines of other organizations, this service might be blocked by policy - talk
to your IT department.) The necessary steps as of this writing are slightly
unintuitive and may require some trial and error.
In brief:
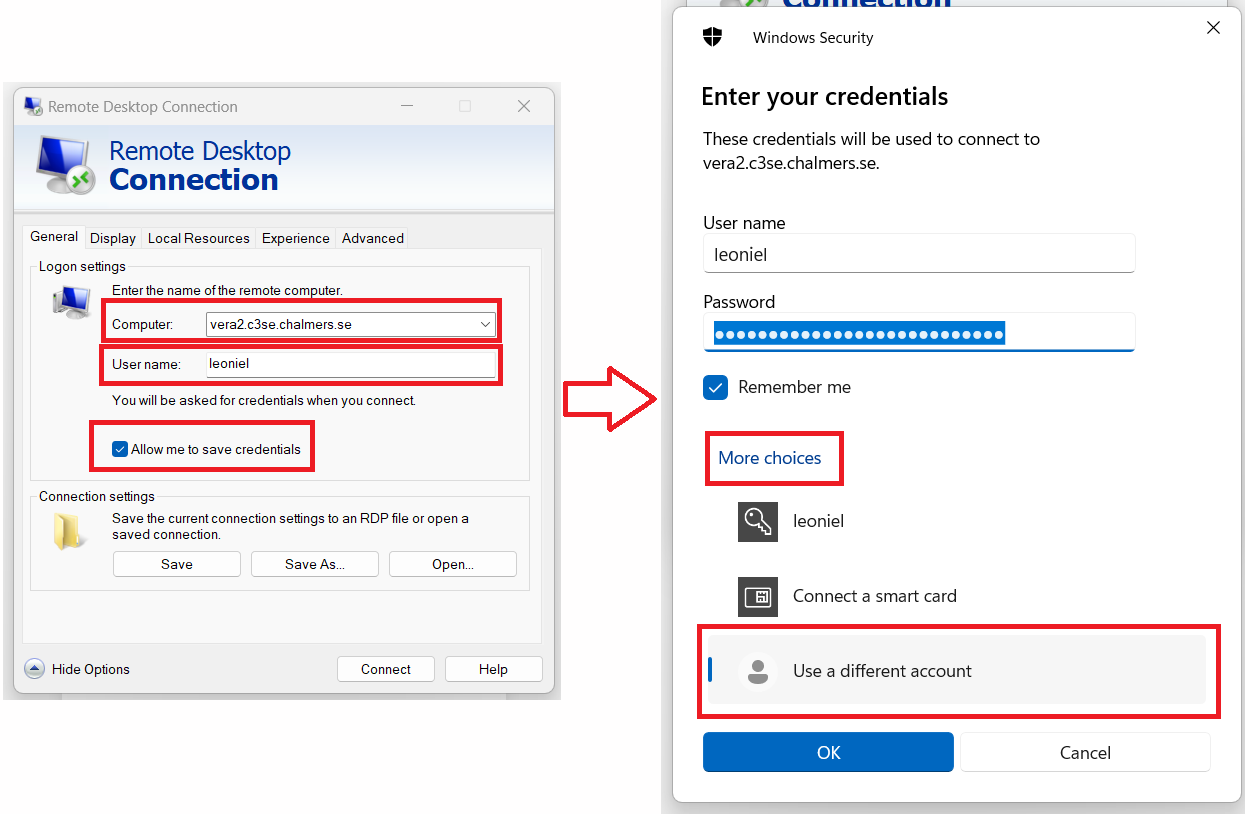
- Start
mstsc.exe(Remote Desktop Connection) and click "Show options" to get the view shown in the image. - Type in the server you want to connect to in the "Computer" field (e.g.,
vera2.c3se.chalmers.se) - If there is a checked box
Always ask for credentials, uncheck it. This box is not visible in the image. - Type in your CID in the "User name" box.
- Check the box
Allow me to save credentials - Click
Connect. - If you get a warning about the publisher being unknown, you can ignore it as this appears to refer to Microsoft's Network level authentication scheme, which is largely undocumented and not supported on non-Windows servers. The Vera and Alvis servers have valid f certificates issued by Letsencrypt.
- You will get a propmt to enter your credentials. This may be pre-filled with a
Microsoft ID, and you may need to click
More ChoicesandUse a different account. You can then enter your CID (again) along with your password. - You should now be able to connect by clicking
OK. - You should be able to reconnect to this server without trouble, but you will need to repeat these steps for each of the servers.
Note that you should also be able to connect using the token-based login by
selecting "Native client" from the Vera remote desktop web pages and running the
.rdp file. You may have slightly different experiences logging in in this way
depending on whether you have logged in by manually entering information before
or not.
Mac OS Windows App
For connecting from Mac OS, you can use the
Windows App,
available via Apple Store. Select "Devices" and "Add PC". In the "PC Name"
field, enter the hostname (e.g., vera1.c3se.chalmers.se). Then enter your CID
and your password in the credentials section, and click Add. Once the device
is added, you can double-click it to connect to the remote desktop session.
You should also be able to log in by using the Native client button on the
Vera web remote desktop pages and running the .rdp file downloaded.
FreeRDP 3.0+ clients (Remmina, krdc, etc.)
If you do not have a preferred RDP client for Linux, we suggest Remmina. For
FreeRDP-based clients you should be able to download the connect.rdp file from
each server and open it with the client, and then supply your CID and password
into the prompt to log in directly:
If you do not have at least FreeRDP 3.0, the CID/password prompt does not work
properly, and you instead need to import the .rdp file or create a new
connection, and then enter the server name (e.g., vera1.c3se.chalmers.se) as
well as your CID and password.
As with the other native clients, running the .rdp file downloaded with the
native client should allow you to log in directly.
Devolutions RDM
Devolutions RDM is a cross-platform remote desktop manager supporting a range of protocols, similar to Remmina. It is free for single-client use. The feature set differs somewhat between operating systems but RDP is well supported on all platforms.
SSH Tunnelling
At some institutions, the standard RDP port 3389 may be blocked for external
connections as a result of legacy configurations from less secure versions of
the protocol. You can circumvent this by using an SSH tunnel, which establishes
an SSH connection that your desktop client can connect over. In Remmina, this is
available as part of the configuration of the client. If you use a Mac or
Windows, you need to open a separate terminal/command line interpreter and run
This means: Open an SSH connection to the server (in this case, alvis1) and
create a tunnel that connects your local computer's port 3389 to the remote
host's port 3389. In the RDP client, you then specify localhost rather than
alvis1.c3se.chalmers.se as the remote computer. Note that when doing this, you
will get a certificate warning, because the certificate will indicate that
alvis1.c3se.chalmers.se is the name of the server, whereas your connection
details indicate localhost. The certificate used by the server is the same as
when you log in to https://alvis1.c3se.chalmers.se, so you can validate it
manually by comparing it to the certificate used by your browser.
Running 3D applications - VirtualGL
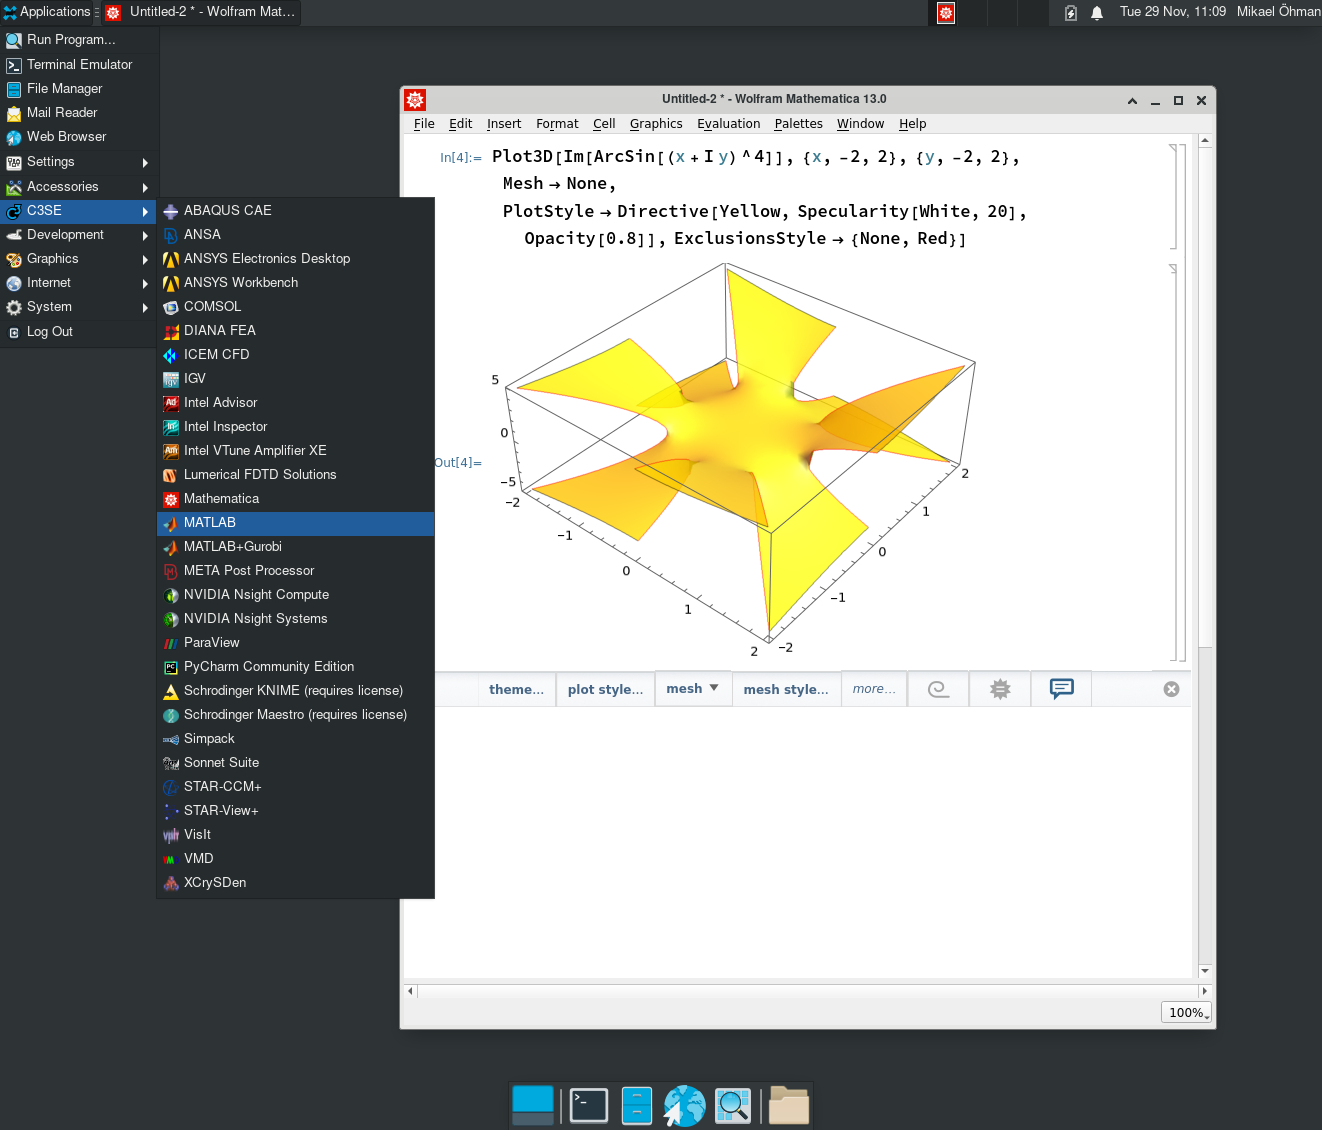
You can use VirtualGL to run run OpenGL software with hardware acceleration. This is often required as many applications are too buggy in software rendering to be usable. Most graphical softwares are available through the application menu. If you need to launch the applications yourself via the terminal, you need to run
Some applications circumvent VirtualGL, and requires additional setup. Matlab requires running
Known errors
Pre-loading modules in .bashrc will most likely cause remote desktop sessions
to break. You should use an alias for loading them instead and run that
after logging in.